There’s a saying by the international fine-art portraitist Vernon Trent that goes something like this:
“Amateurs worry about equipment, professionals worry about money, masters worry about light…”
It’s profoundly Zen, and befittingly hearkens back to a more cerebral approach to photography – a bit beyond late night selfies and SnapChat.
I’ll throw another one at you:
“Light – it’s as simple as it is complex.”
If that one doesn’t get your brain David Lynch-ed and you want to toss it around at your next photo-geek meeting, be sure to send the credit and/or hate letters leaking anthrax my way.
When working with beginner classes, I often compare photography to big-wave surfing. I mean, obviously photogs are equally as badass as some dude staring down death in a 60-foot barrel, but stay with me here for something a bit more sublime.
You’ll never see the Bodhisattva surfer pull up to a beach, hop out of his wagon with golden locks all a-flow down his tribal-inked ripped shoulders, grab his stick and jump right in to the watery jaws of awesome. At least not in real life.
It’s more likely our surfer dude will arrive, stride his stoner-stride to the sand, and study the waves in silent repose. It’s something I learned from my dear old dad (sans stoner swagger), and it’s what keeps more badass surfer dudes like our hero from drowning. In quiet genuflection he waits and watches the ocean, reading the break for its temper. Patience triumphs over ego, and only then will he enter his temple, mind full of awareness but a body moving with graceful Sartori.
Life moves in waves; his are waves of liquid, ours are waves of light. And as the surfer studies the water before jumping in over his head, so should photographers study the light before even considering raising their viewfinder. And those are waves of nausea you’re feeling from all this hippie-talk – I’m done I promise.
It’s no easy task, especially in this point-click-post society we have become, enamored as we are with self and consumed by the immediate gratification of one more “like” or comment. Not easy, that is, to fight temptation and start spraying down a scene immediately with your high-powered DSLR. But this exercise is employed by every master photographer, who through cocked head and squinted eyes, takes it all in: quality and quantity, direction and duration, contrast and color. Light becomes a tool, and those who have truly mastered this tool are few and far between.
So, now that we know what masters do, here’s what I look for when I arrive on scene:
What light is already here? Is that light my friend, or is it my enemy? Where are my underexposed areas and what do I risk blowing-out on me? What’s so dark it’ll go grainy if I try and pull details in post? What’ll cause flare like Hiroshima in my lens? Is there any light that can be adjusted? Is our scene pure 6500k or do we have a cacophony of color temps that only a kid blitzed-out on Adderall with a 128-box of crayolas and a blowtorch could recreate? Any specular highlights (stuff that should be pure white – RGB 255:255:255 or reflections on a chrome bumper or Snoop Dogg’s grill)? Gradients? Filters? Gradated Filters? Polarizer: hero or meh? Any pure blacks (RGB 1:1:1 or Stealth Bombers over the Mojave at midnight)? What lenses do I need to get the light I need? Do I have enough light to stop action? Where is my primary light source and what’s the quality – diffuse, harsh? What do I need to add? What do I need to take out? How much am I going to screw things up by adding more light? Is there enough power to set strobes? Is it going to start another fire? Did I remember the reflectors? Did my assistant remember the reflectors? Where the f*ck is my assistant? What’s it going to take to make the light perfect? How long will it stay perfect before it goes to total puke?
Big mental dialog, and this all goes down in the time it takes my talent to start tossing out excuses why she feels fat. IE Instantly.
Once you’ve sorted through the above, it’s time class to get specific.
Contrast and Exposure
Contrast is a fairly straightforward metric, your light:dark or color:color ratio of the scene or parts therein. For those photo group geeks, light intensity is measured in lumens, watt/seconds, or things called foot-candles, which, to the surprise of most, are not leftover props from 50 Shades of Grey.
Regardless of measure, contrast is something that is often overlooked when composing a scene, and below is a good example of how a little legwork (pun intended) can help make your shots shine.

In this image, you can see how the climber’s body stands out from the cave – I purposefully put myself at a high angle to capture her against the darkest part of the background. Using light:dark ratio I put her against a part of the cave I knew would underexpose. From a less-calculated perspective, her skin tone might have been against the limestone in the shot, causing her to get lost in the scene.
Having a little clairvoyance helps (knowing where the action will be most dramatic), as does the ability to see like a dog. I’m talking about envisioning your frame in black and white, where colors take on greyscale values and you can start to think simpler and see darks and brights.
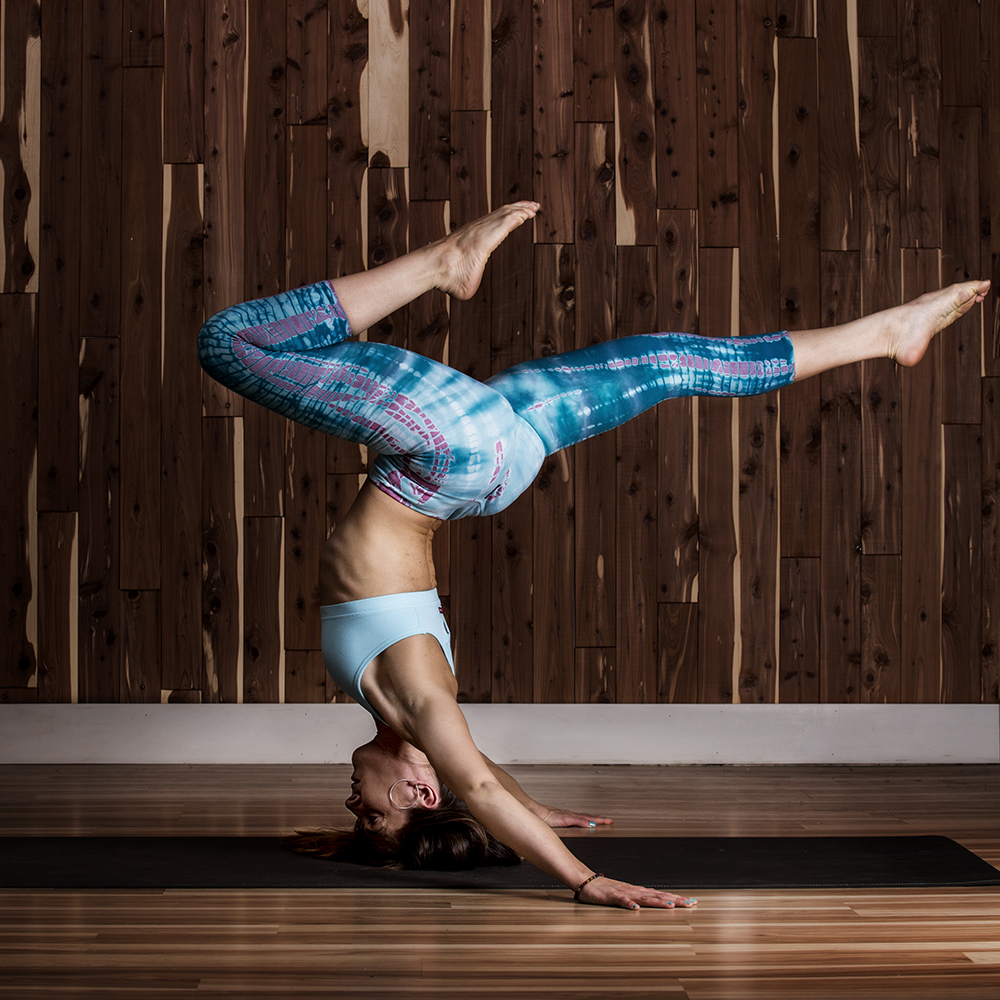
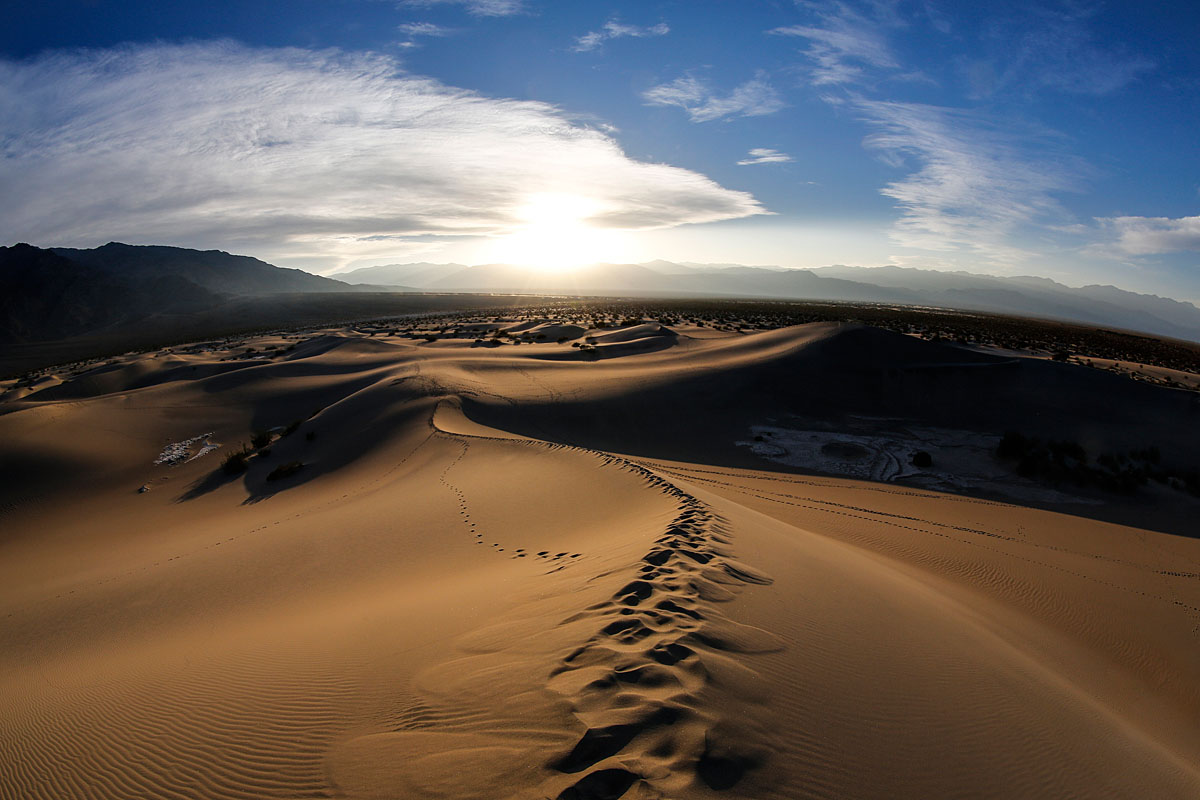
Color contrast is another great tool – you’ll see it in photography where athletes wear colored clothes to stand out against similarly-toned backgrounds. Shooting in the desert? Use blues to stand out against sandstone. In the water? Pinks and yellows work awesome. Take a look at the top image, it’s no accident I chose a cold tone to go against the warm background of our yogi’s headstand.

One thing here on portraiture and contrast. Skin tones tend to look softer against darker backgrounds. For those getting started with portraits, put your willing subjects against dark (low-key) backdrops to make their skin appear softer, or use lighter (high-key) backgrounds to add strength and harshness.
A final note on the subject: the human eye is naturally drawn to the brightest thing in a scene, use that to help call out your subjects. Congruently, keep competing artifacts of similar tone out of frame. Our example here shows two different frames of the same scene, one with the overexposed sky cropped out to help close-off the tonal range.

Shadow
This comes into play when you, your subject, or the light source can be mobile. In other words good luck with this one shooting that overhead 747. Shadows can be found, created by adding light or subtracting exposure, or even added by using black fill cards. A very easy understanding of this comes with a photography 101 example. Fix in place either your subject or your light and move the other. Move it closer, and watch the shadow line grow darker and more defined; move it back and your shadow softens and becomes weaker (less contrast). In photo lab we had a mannequin head that we’d orbit around a light bulb – great for visualizing light and shadow on the human form. Wisely, the administration decided as school kids we’d only be given the head. What Mr. Burke did with the body I shudder to think.
Texture
Ahh, the fine delicate flakes of a just-baked croissant, aromatic and tender. The pitted and weathered leather interior of an Aston Martin Vanquish. Surfer-dude’s shredded rectus abdominis. What do these all have in common? Well, besides things I’m betting you don’t have but wish you did? The answer, dear readers, is sidelight. Sidelight! Of course. If you want texture, add sidelight!
Simple, yet effective. Want that ancient cowboy’s skin to show every wrinkle and crow’s foot from here to El Paso? Hit ‘em with 1000 watts per second from the side, partner. And that ballerina – she need a little help softening up her face? A straight-on light will help vanquish her varnish, eliminating shadows and giving that soft glow befitting to her fine form.
Reflections/Specularity
Here’s where our old friend Physics comes in – remember him, from underneath the boozy haze of 3rd period? There was this guy, Snell, and he said something along the lines of, for light and for our purposes, “the angle of incidence equals the angle of refraction.” I like to pull this one out on set and explain to my subjects who freak out about their glasses casting a glare in all their photos because they were too cheap to pay the extra 25 bucks for the anti-glare coating.
Basically, when you have light moving at any angle towards a flat planar surface, it will return at that same angle. Try this: shoot a head-on photo of a mirror with your flash, and whammo: nuclear sunrise. In the next frame, alter your angle to the mirror, so that the flash is not hitting straight on. Difference? You’re welcome. I find it helpful to think about a bank-shot in pool, or ball bouncing off the ground.
Not only will you now have glare-free windows and mirrors in your photos, if you tilt up the flash or down the glasses, you can see Mr. Spectacles’ unadulterated eyeballs. Just remember to bank that high light to keep the light clear of his dome too…
Bounce
I’m not talking about your Big Freeda twerkfest here. Funny – spell check tried to change “twerkfest” to breakfast. Big Freedos – I’d totally have a bowl of those for twerkfast – or not.
I digress. In any event, direct light from a strobe kinda sucks. Precisely why Santa is flanked by as many umbrellas as he is overheated drooling germ-factories in your local mall come December. Light bounced from umbrellas (or any source) softens the light, and reduces contrast, softening the subsequent shadows.
For those with flashes with rotating heads, and are shooting indoors, try pointing the flash to the ceiling, walls, or other reflective objects. Caveat: to ensure even light and good color, those bounce surfaces should be large and of a flattering tone. Just like Big Freeda’s bounce surface.
Color Temperature
Okay this one should be an entry of its own, so to keep it simple I’ll offer caution when mixing light sources. Try to avoid large sources of light that fade down to nothing. Think of a large room with huge windows on one side opposing a dark wall lit by tungsten filaments, and with a dark ceiling. Nightmare? You bet. I handled it like any pro: Photoshop.
When in doubt, shoot RAW, or even bracket for color temps and try and blend it in post. The custom white balance trick works, but only if you want that color cast neutralized for the whole scene. IE if you balance for a white card next to the tungsten lamps, that daylight coming in through the windows will look as blue as the hypoxic lips of a frozen dead smurf in the shade of a Siberian winter.
Reaching Enlightenment
The above are just a few tips on how to start your thinking process a little differently before you your next shoot – before long it’ll be you with the slitty eyes and cocked head, alarming your friends when caught staring strangely into the wall sconces through an out-of-focus gaze. Kinda like high school Physics. Until next time – shine on you crazy lightbeams.
Chris Vultaggio is a Mountainsmith Ambassador and a regular contributor to the Mountainsmith blog.
Follow Chris
One of the brilliant items i’ve read in the week.